|
| |
| DxO Optics: Process the pictures |
|
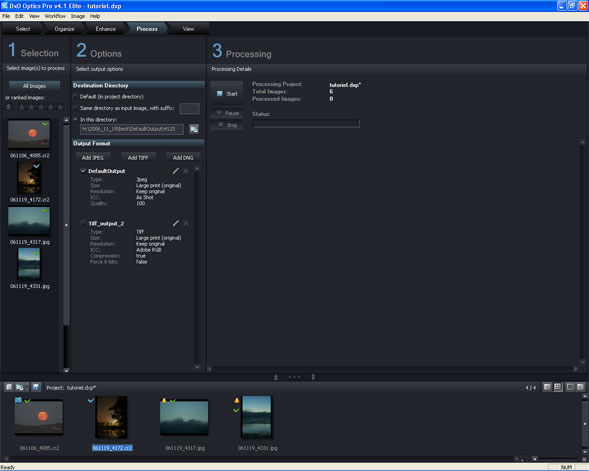
This is the step in which the process will occur.
|
|
 |
|
The windows has three zones:
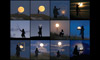
1. Selection: This is where are the picture to process. You can give them some stars to give them priority
in the workflow. Then, the photo which have a lot of stars will be process in first.
2. Options: this is one of the most abstruse part of the software. It has two parts:
 - Destination Directory: this is where you'll choose where to save you
processed files (a suffix can be added if the processed pictures are saved in the input directory). By default, the processed pictures
will be placed in the directory where your project has been (or will be) saved. - Destination Directory: this is where you'll choose where to save you
processed files (a suffix can be added if the processed pictures are saved in the input directory). By default, the processed pictures
will be placed in the directory where your project has been (or will be) saved.
 - Output format: it is possible to save the processed picture under many
formats. For example, a processed picture car be saved in TIFF or DNG (the new non-destructive format created by Adobe) for high quality
print and in JPEG in reduced size and medium compression for publication in the Web. For each of those formats, that you can use if
you want (by checking or not), you can choose the size, the compression, the ICC profile, etc. Here, I've choosen to save
the processed files in max quality JPG and in 16 bits TIFF compressed without loss by integrating the AdobeRGB profile. - Output format: it is possible to save the processed picture under many
formats. For example, a processed picture car be saved in TIFF or DNG (the new non-destructive format created by Adobe) for high quality
print and in JPEG in reduced size and medium compression for publication in the Web. For each of those formats, that you can use if
you want (by checking or not), you can choose the size, the compression, the ICC profile, etc. Here, I've choosen to save
the processed files in max quality JPG and in 16 bits TIFF compressed without loss by integrating the AdobeRGB profile.
 To add a new output size, you just have to click on Add XXXX. On the right,
I create an output in JPG of 1024 pixels in width and a compression quality of 60 dedicated to the publication in my Website. To add a new output size, you just have to click on Add XXXX. On the right,
I create an output in JPG of 1024 pixels in width and a compression quality of 60 dedicated to the publication in my Website.
Create as many format as you need and keep them. You'll just have to check the one you want to use for a lot of photos.
|
|
3. Processing: by clicking the  button,
you launch the process of the workflow. But before, you have to save the project to keep the settings. button,
you launch the process of the workflow. But before, you have to save the project to keep the settings.
|
|
Notice: the process of the workflow can be long. For example, it needs about 30 s for
a photo from my Canon 350D (8 Mpixels) with my computer (AMD Athlon + at 2 GHz and 1 Go RAM in PC3200).
You can use your computer for somthing else at the same time, but it will be slow. In the Edition medu, then Preferences...
and Performance (see picture bellow), you can give the software the power you want and keep the rest for the other softwares.
|
|
|

|
|
| << See the presets |
See pictures viewing >> |
|
|
|